
But in real life, returns are where mistakes happen. Staff jump between screens, miss a line item, refund the wrong amount, forget to restock, or get stuck when an order has unfulfilled items tied to it. Shopify’s newer approach fixes a lot of that by putting the entire return and exchange flow directly inside the cart.
This article breaks down what “returns and exchanges in cart” means in Shopify POS, what changed in Shopify POS v11.5, and how to set it up so your team can actually use it without slowing the line down.
What “returns and exchanges in cart” means in Shopify POS (and why it matters)
“Returns and exchanges in cart” means exactly what it sounds like : staff handle returns, refunds, and exchanges inside the same cart screen where they normally ring up sales.
No bouncing between separate return screens. No weird back and forth. You look up the order, add the items you’re returning into the cart, decide restock and reasons, then finish the transaction like you would any other cart flow.
In practice, this covers :
- Returns and refunds (full or partial)
- Exchanges (return one item, sell another item, same transaction)
- Restock decisions per item (restock vs do not restock)
- Removing unfulfilled items in certain mixed or partially fulfilled situations
- Capturing return reasons consistently (if you enable it)
Why it matters operationally, not just “nice UX” :
- Faster counter flow. Staff stay in one place, so it’s easier to move quickly even when it’s busy.
- Fewer mistakes. The cart summarizes what’s being returned and what’s being purchased, so the math is less manual and less error prone.
- Cleaner reporting. Return reasons (when required) are structured instead of being random notes like “customer didn’t want it”.
- Better control for high risk actions. Permissions and manager approvals can apply to sensitive steps like restocking, removing unfulfilled items, and completing in-progress returns.
A realistic expectation, though : availability depends on your Shopify POS app version and how your staff roles are configured. The in-cart workflow rolled out with Shopify POS v11.5, and permissions can change what each staff member can actually do.
Before you start : requirements, setup, and where to find the return tools
Before you train anyone, check the basics. Most “POS returns aren’t working” issues are just one of these.
High level prerequisites :
- Shopify POS app updated to v11.5 or later
- Staff member is signed in and has access to the correct store location
- Staff permissions allow return and exchange actions (and any approvals you expect them to do)
Where the workflow lives inside POS :
- Order lookup (you start from the original order in most cases)
- Cart (this is where the return and/or exchange gets built and completed)
- Smart Grid tiles (depending on your setup, you can surface return actions as tiles for speed)
Also, Shopify’s UI changes over time. The Help Center is still the source of truth for the latest screens and wording. If anything looks slightly different than what you see in your app, assume the doc is more current than a random screenshot.
Quick checklist you can run today :
- Confirm Shopify POS version is 11.5+
- Confirm staff member role has return permissions
- Decide whether you want to enable Require return reasons
- Confirm Smart Grid has the tiles your staff actually uses (so returns are not buried)
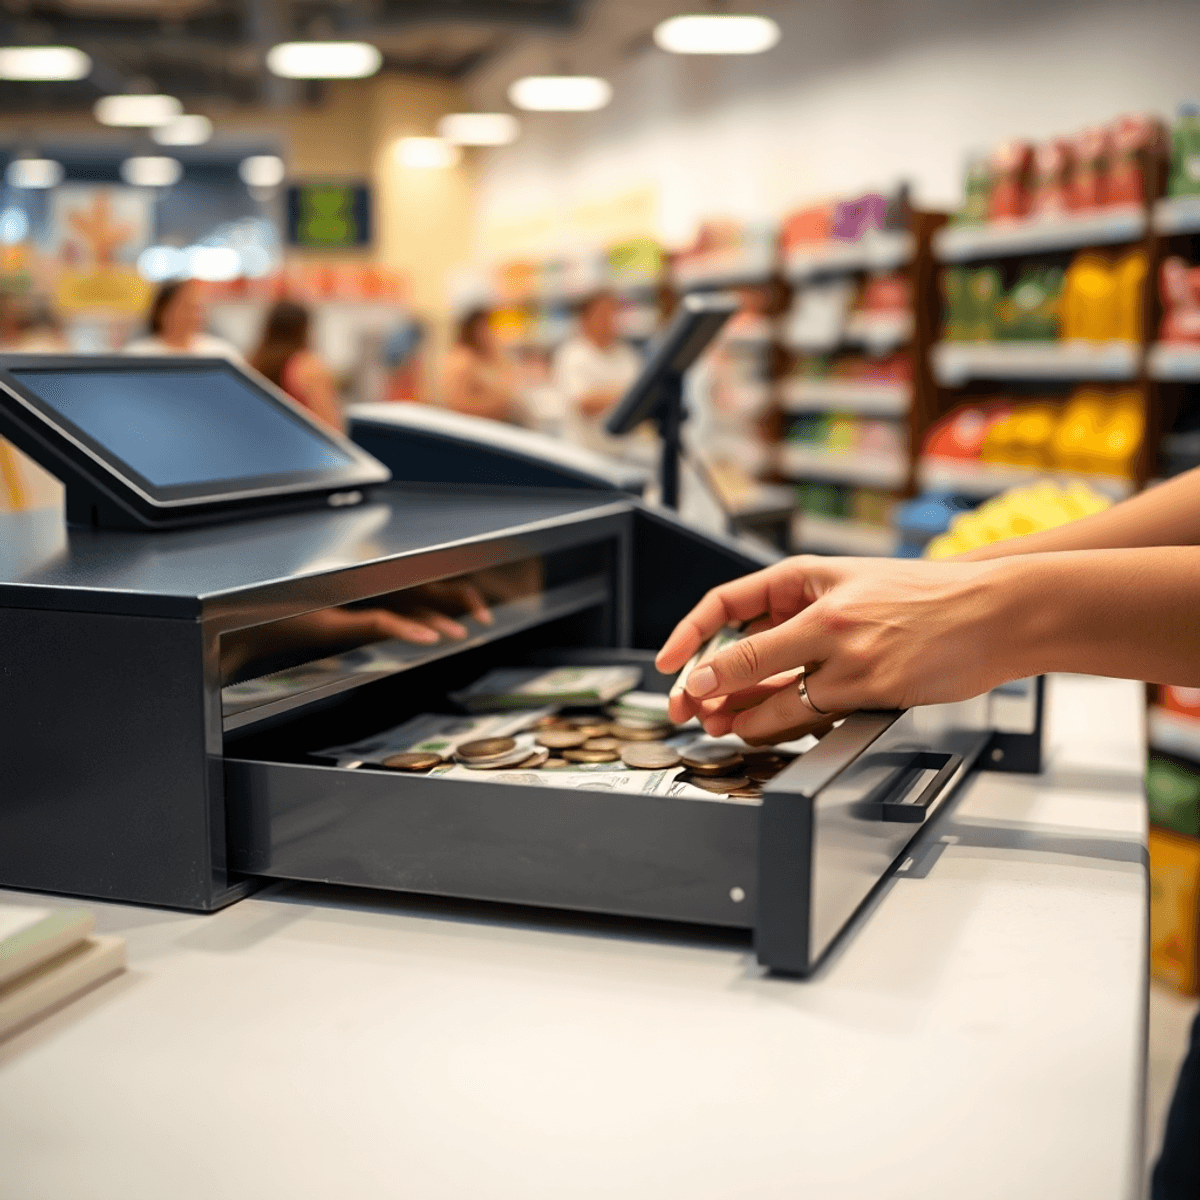
How to process a return in the Shopify POS cart (step-by-step)
The cleanest return starts from an order. That’s where the system knows exactly what was purchased, how it was paid, and what is eligible to be returned.
Here’s the typical flow.
1. Locate the original order
From Shopify POS, use the order lookup (the exact path can vary by layout). Find the customer’s order by :
- receipt or order number
- customer name
- email or phone
- card used (in some setups)
Once you open the order, you should see the line items that can be returned.
2. Add eligible items to the cart for return
Select the items and add them into the cart as return line items.
This is where the in-cart workflow starts to feel different in a good way. The cart becomes the single “truth” of what’s happening.
3. Choose quantities and handle partial vs full returns
You can return :
- Full return : all quantities for the item(s)
- Partial return : only some quantities, or only certain line items
Partial returns are common. Customer bought two of the same candle, wants to return one. Or they return the shirt but keep the belt. Make sure staff explicitly confirms quantities, because this is still the easiest place to mess up when you’re rushing.
4. Review refund method and totals (conceptually)
Refund options depend on how the original order was paid. Shopify POS will guide the available refund methods based on the payment type and what your hardware/provider supports.
The important thing for training is not memorizing every payment edge case. It’s teaching staff to pause and read the cart summary :
- returned items
- refund total
- taxes involved (if applicable)
- any fees or adjustments your policy uses (if any)
5. Make the key in-cart decisions : restock and return reasons
Two big decision points usually show up during the return :
- Restock vs don’t restock
- Return reason (if your store requires it)
Restock should not be an afterthought. It directly changes inventory counts, and it affects replenishment, transfers, and even what customers see online as “in stock”.
Return reasons, if enabled, should be quick. Pick one. Don’t type paragraphs.
6. Complete the return and confirm outcome
Finish the return in the cart. Issue the receipt if your workflow requires it (printed or digital).
After completion :
- inventory updates according to the restock choice
- the order updates to reflect returned/refunded items
- reporting captures the return and reason data (if enabled)
How to process an exchange in-cart (most common scenarios)
In Shopify POS terms, an exchange is basically : return something, sell something else, in the same cart.
This matters because most customers don’t say “I want a refund”. They say “I need a different size”. That’s an exchange. And the in-cart workflow is built for it.
Scenario 1 : Same item, different variant (size or color)
This is the most common exchange.
Steps :
- Look up the original order
- Add the original item to the cart as a return (select the correct quantity)
- Add the replacement variant to the cart as a new sale item
- Review the cart summary for the net difference
- Choose restock and return reason (if required)
- Complete the transaction
If the price is the same, it should settle as an even exchange. If not, the cart shows either an amount due or an amount to refund.
Scenario 2 : Different product exchange
Customer returns a hoodie and grabs a jacket instead.
Steps are basically identical :
- Return the original item into the cart
- Add the new item(s) being purchased
- The cart calculates the difference
This is where staff need to slow down just a second and confirm they didn’t accidentally add the original item as a new sale item instead of a return. It happens.
Scenario 3 : Even exchange vs customer pays or gets refunded the difference
Teach this like a simple rule :
- If replacement items cost more : customer pays the difference
- If replacement items cost less : customer gets refunded the difference
- If it’s equal : even exchange, no net payment
The cart does the math, but staff still needs to sanity check it before completing.
Return reasons and restock choices still apply during exchanges. Even though it feels like “just swapping sizes”, it’s still a return on the backend.

Return reasons : how to configure “Require return reasons” (and when you should)
The Require return reasons setting forces staff to pick a reason whenever they process a return. It’s off by default at launch, but it’s worth considering if you care about reporting or consistency.
What it does for you :
- stops vague explanations like “return” or “didn’t like”
- makes reporting cleaner across locations and staff
- helps identify patterns (quality issues, sizing issues, fulfillment errors)
Where to configure it (high level) : this is typically an admin setting in your POS and returns related settings. Exact navigation can shift as Shopify updates the admin and POS channels, so if you don’t see it where you expect, use the Help Center search for “Require return reasons Shopify POS”.
How it changes the staff experience :
- it adds one more required step during the return flow
- but it usually saves time later because managers stop asking “why are we seeing so many returns on this product”
Practical return reason categories that work in the real world :
- Didn’t fit
- Defective
- Damaged
- Changed mind
- Wrong item sent
Try to keep the list short enough to be fast. If you give staff 25 options, they’ll pick randomly just to get past it.
One more operational tip : align return reasons with fraud prevention and merchandising. If “wrong item sent” spikes at one location, that’s a process issue. If “changed mind” spikes on a product line, maybe the product page is overselling it.
Staff permissions and approvals : controlling who can return, refund, and exchange
Returns are one of the easiest places to lose money, accidentally or not. So the new and updated Return permissions in Shopify POS matter.
The basic idea : not every staff member should be able to do every return action.
A simple tier model that fits most stores assigns distinct responsibilities to each role.
Cashier
- View orders
- Initiate returns or exchanges within policy
- Cannot override sensitive steps without approval
Supervisor
- Approve refunds above a set threshold
- Manage restocking decisions where your process requires it
- Handle no-receipt or unusual return scenarios
Manager
- Override policy edge cases
- Approve high-value refunds
- Resolve in-progress return issues at end of day
Shopify POS also supports manager approvals via settings like Return & exchange orders manager approval. What triggers approval is store-defined, but in practice it is usually one of the following :
- High-value refund amounts
- No-receipt returns
- Returns outside your return window
- Actions like managing restock or completing in-progress returns, depending on your configuration
Implementation guidance that avoids surprises :
- Set permissions per role
- Test with a dummy transaction covering a return, an exchange, and a mixed cart
- Write your store return policy in plain language and keep it accessible at the register
If staff are guessing, they will either refund too much or call a manager for everything. Both are bad.
Inventory and fulfillment edge cases : restocks, unfulfilled items, and mixed orders
This is where returns can quietly break your inventory. The cart workflow helps, but only if staff uses the tools correctly.
Manage item restock (and why it should be a checklist item)
“Manage item restock” impacts inventory counts. It should be a standard question during every return :
- Is the item in resellable condition ?
- Are we restocking it to the correct location ?
- Or is it damaged and should not go back into available stock ?
If your store does inspections later (like back room checks), you might choose not to restock immediately, or restock into a specific workflow. But decide that intentionally.
Remove unfulfilled items (when orders include pickup or ship later)
Some orders include unfulfilled line items, like :
- buy in store, ship later
- pickup later
- split fulfillment across locations
If staff accidentally treats an unfulfilled item like a return, things get messy fast. The “Remove unfulfilled items” permission and manager approval behavior exists to prevent the wrong kind of adjustment.
Training point : staff should confirm what is fulfilled vs unfulfilled before they process changes, especially on mixed fulfillment orders.
Mixed carts (returning items and buying new items)
The in-cart flow supports mixed carts, which is great. But it also means the cart can get cluttered.
Tips to keep it clean :
- confirm returned items are clearly marked as returns before adding new items
- avoid duplicating the same product as both a return and a new sale by mistake
- read the net total before completing
Location accuracy
If you run multiple locations, the restock location matters. Always confirm the correct location is selected during the return process so stock doesn't drift across stores.
Inventory drift is usually not one big mistake. It's 40 small ones.

In-progress returns : how to complete (or recover) a return started at the register
An in-progress return is what it sounds like : someone started a return and didn't finish it. Common causes include a payment terminal issue, a customer walking away to grab another item, a shift change, a manager approval delay, or a simple interruption at the counter.
Instead of restarting from scratch, staff with the right permission can find the return and use Complete in-progress returns.
To keep this from becoming a daily mess, follow these operational guidelines :
- Assign ownership — decide who closes stranded returns, usually a supervisor or manager.
- Review exceptions at the end of each day.
- If your store enables manager approval for these actions, make sure managers know they will be asked to approve them.
Also worth noting : at launch, some new return permissions — Manage item restock, Remove unfulfilled items, and Complete in-progress returns — were allowed by default. That's convenient, but you should still review them and decide if they match your risk tolerance.
What changed in Shopify POS v11.5 (and how to train your team fast)
Shopify POS v11.5 introduced the big shift : returns, refunds, and exchanges now happen in the cart. The update brings a single cart-based workflow for returns and exchanges, tighter permissions and better operational controls, support for return reasons and Smart Grid access, and manager approval prompts that apply to more return-related actions depending on your settings.
What staff will notice immediately
- Returns and exchanges feel like building a normal cart, not entering a special mode.
- Return reasons might be required if you turn that setting on.
- Approval prompts might appear where they didn't before.
- Smart Grid tiles can speed things up significantly if you set them up.
A quick training plan that doesn't take a full afternoon
Start with a 15-minute walkthrough on a quiet day. Then run three practice scenarios : a simple return with a same-tender refund, a variant exchange for a different size or color, and a mixed cart that combines a return with buying something new.
Create a one-page cheat sheet and keep it by the register. It should cover :
- Order lookup steps
- Your restock yes/no rule
- When to call a manager
- What to do with unfulfilled items
Keep links to your internal SOP and Shopify Help Center docs handy so you're not rewriting training every time Shopify adjusts the UI.
Putting it all together : a simple store-ready returns/exchanges workflow
If you want one consistent process your team can follow, use this :
- Verify the order (and confirm it’s the right customer and items)
- Add items to the cart for return
- Select quantities (partial vs full)
- Choose restock or don’t restock (and confirm location)
- Capture return reasons (if enabled)
- Add replacement items if this is an exchange
- Review net totals (refund due vs amount due)
- Get manager approval if prompted or required by policy
- Complete the transaction and issue receipt
Consistency is the whole win here. Permissions plus return reasons plus approvals reduce fraud, reduce errors, and reduce inventory drift.
Next steps that usually make the biggest difference :
- review staff permissions and remove “everyone can do everything”
- decide whether to enable Require return reasons based on your reporting needs
- validate your Smart Grid tiles so returns and exchanges are easy to start at the counter
Conclusion
Shopify POS v11.5 moving returns and exchanges into the cart is one of those changes that seems small until you run a busy counter for a week and realize how much time it saves. Fewer screens. Cleaner math. Better controls.
If you do nothing else after reading this, do these three : update to v11.5+, review return permissions, and standardize return reasons. Then run a few practice exchanges with your team so the first real customer return of the day doesn’t become training time.
FAQs (Frequently Asked Questions)
What does 'returns and exchanges in cart' mean in Shopify POS, and why is it important ?
'Returns and exchanges in cart' means handling returns, refunds, and exchanges directly within the same cart screen where sales are rung up in Shopify POS. This approach eliminates the need to switch between separate return screens, streamlining the process. It's important because it speeds up counter flow, reduces mistakes by summarizing transactions clearly, improves reporting with structured return reasons, and offers better control through permissions and manager approvals for sensitive actions.
What are the key requirements to use the returns and exchanges in-cart workflow in Shopify POS ?
To use the in-cart returns and exchanges workflow, you need : 1) Shopify POS app updated to version 11.5 or later; 2) Staff members signed into the correct store location; 3) Appropriate staff permissions that allow return and exchange actions, including any necessary approvals; and 4) Smart Grid tiles configured to surface return actions for quick access.
How do I process a return using the Shopify POS cart step-by-step ?
Processing a return involves : 1) Locating the original order via order lookup by receipt number, customer name, email, phone, or card used; 2) Adding eligible items to the cart as return line items; 3) Selecting quantities for full or partial returns; 4) Reviewing refund methods and totals based on original payment type; 5) Making key decisions like restocking items or not and providing return reasons if required; 6) Completing and confirming the return transaction.
Can staff handle partial returns or exchanges within the Shopify POS cart ?
Yes, staff can handle both partial returns (returning some but not all quantities of an item) and exchanges (returning one item while purchasing another in the same transaction) directly within the same cart screen. This flexibility helps accommodate common real-life scenarios like returning one candle out of two purchased or exchanging a shirt for another item.
How does Shopify POS manage restocking decisions during returns ?
During returns processed in-cart, staff must decide per item whether to restock it or not. Restocking affects inventory counts, replenishment planning, transfers between locations, and what customers see as available online. This decision is integrated into the return workflow to ensure accurate inventory management.
What operational benefits does handling returns inside the Shopify POS cart provide ?
Handling returns inside the cart leads to faster counter flow since staff stay on one screen without switching contexts. It reduces errors by summarizing all returned and purchased items clearly with accurate calculations. Reporting improves because return reasons are captured consistently instead of random notes. Additionally, sensitive steps like restocking or removing unfulfilled items can be controlled via permissions and require manager approvals when necessary.
